We have prepared for you the specific steps to teach a kid to ride a bike, as well as the teaching of what needs to be done to prepare.
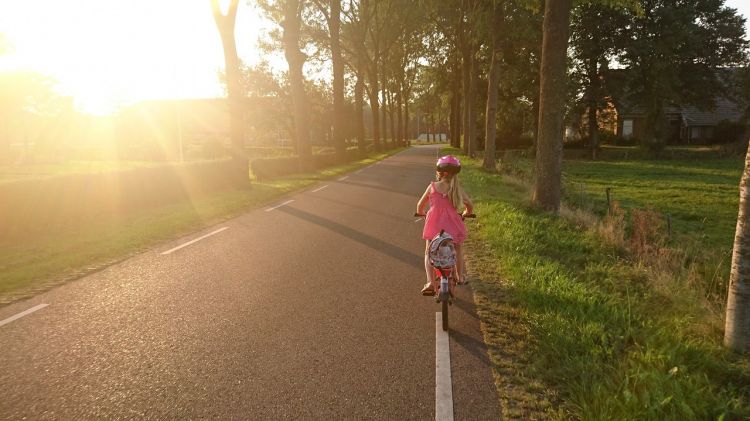
In many cases, parents are always willing to pay for their children to have a healthy and happy childhood. If there is an activity that builds courage and confidence in children and can be a lifelong skill, I think riding is one activity that has that ability.
Kids get so much more out of riding, so a proper kids’ bike is a must-have in a child’s development. Of course, no one is born to pedal and ride. This is the time for you to teach your child to pedal and learn to ride a bike. This not only allows parents to be more involved in their child’s development but also allows for a deeper bonding with each other.
Below we have prepared a summary of how to teach a kid to ride a bike for you.
Learn More: Best 20-Inch Bikes For 6-13 Years Old Kids Bikes (With Gears)
What are the benefits of teaching a kid to ride a bike?
- The ride develops children’s brave and strong character and a laughing attitude to face difficulties.
- Get kids interested in riding and interested in bikes.
- Help children learn to balance, pedal, and steer.
What do I need to do before I teach a kid to ride a bike?
If you don’t know much about bicycles, then I suggest you read this article of ours first.
After knowing the basic riding experience of the child, teaching needs to be done according to different children for them to get a better ride.
1. You must choose a route that is safe enough to ride without any major obstacles (rocks, loose gravel, or trees).
2. You need to prepare a child’s bike that sufficiently fits your child’s height and age.
3. Although children’s growth path is always not so smooth. But I still hope that you must prepare your child with adequate protective tools. Protective tools will add courage to your child’s riding.
4. (This is also the most important point): You must have full love and patience and give more encouragement to the children.
How to teach a kid to ride a bike step by step and why?
Step 1: Develop interest
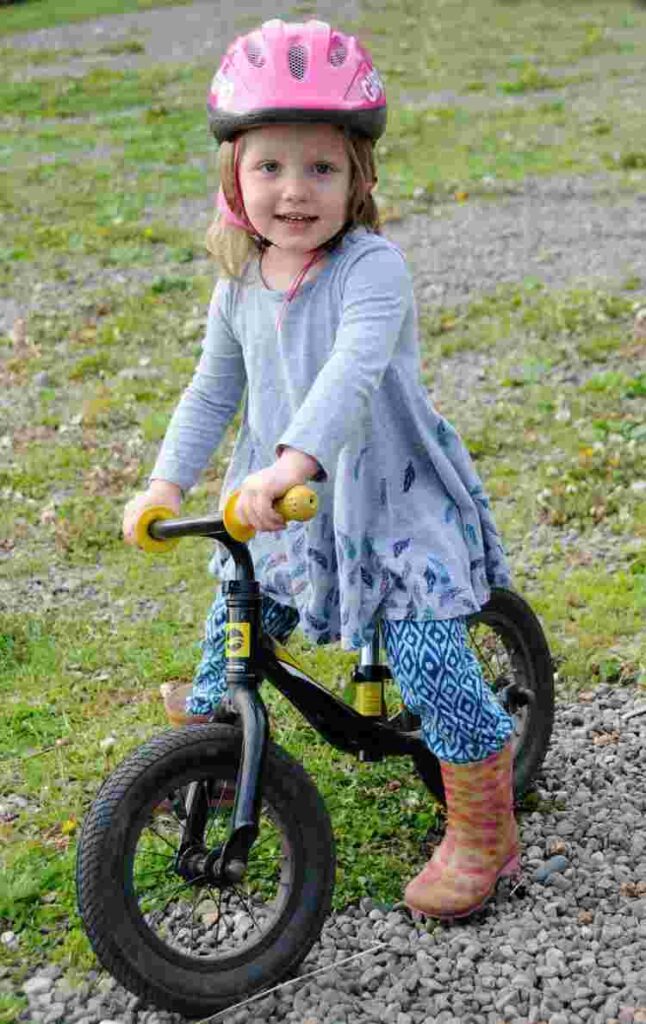
When children are brave and strong enough, it’s time to learn to ride a bike. You can introduce them to introductory balance bikes, or even try to get them to push the bike. Let them visualize the rotation of the tires, and the mood when mastering balance, to stimulate children’s interest in bicycles. You know the saying that many people agree with – “interest is the best teacher”!
Step 2: Measure the size and eliminate the fear
When the children have been pushing the bike for a while, they are already eager to get into the saddle. You can then move on to the next step.
Make sure the bike your child rides is the exact size for his height. A bike that is too big will make his control difficult, and a bike that is too small is not conducive to some challenging bike rides for him (however, a slightly smaller bike will be much better than a bike that is too big).
Eliminate fear. When faced with something unfamiliar, no matter who you are, you will develop fear. Not to mention children.
At this time, you must give your child more confidence. Please don’t be stingy with the “Good!” “Great!” and “Go for it”. Because this will improve the children’s confidence.
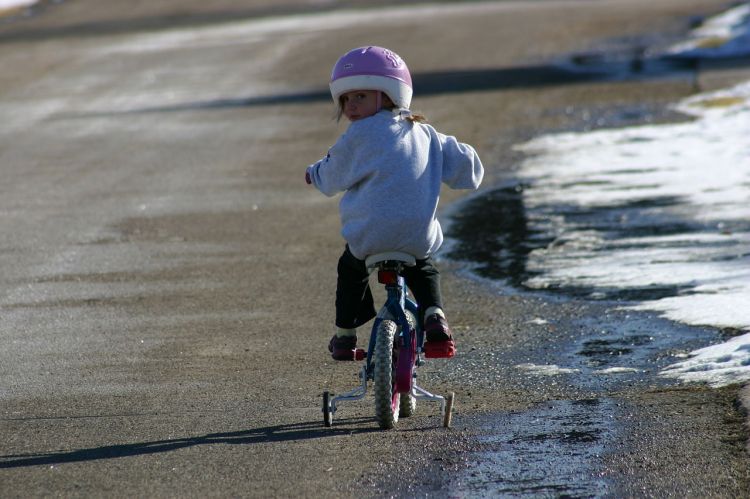
Step 3: Remove the auxiliary tire and remove the pedal
Why do I need to remove the auxiliary tire?
When children have kindled enough interest and confidence, this is the time to simply remove the assist tire from your child’s bike. While you may be confused, most of us as adults now have experience riding with an assist tire in our early years. But let me ask you, do you remember the fear and frustration you experienced when you learned to ride a bicycle and had a good experience with an assist tire all along?
Therefore, you must remove the auxiliary tire at the beginning.
Why remove the pedals?
Different children always require different teaching methods, but few children can balance and get on the pedal at the beginning.
That said, after removing the auxiliary tire, my suggestion is that you can remove the pedals first. The rotation of the pedals will affect your child’s mood. Instead of speeding up their learning process, it will increase their frustration when they are not yet fully learning to keep their balance and can’t wait to step on it.
Step 4: Happy to start straddling the saddle!
What you need to do.
1, Let the child straighten the spine, more focused on looking forward, rather than looking to the ground to see.
2, Help children to hold the handlebars steadily, but please do not help them to control them. This will destroy the child’s initial sense of balance on the bike. In addition, you must give full confidence and encouragement.
3. The right size bike will allow your child’s toes to touch the ground. At this point, you can take the opportunity to simply push the bike and let your child experience the joy of sliding it forward. By having your child actively pedal backward, use the reaction force to get the bike to start sliding forward.
Reasons to look forward
If children focus more on their feet, not only will they not be able to see what’s ahead of them, but they will also neglect to control the bike because they are focusing too much on their feet.
At the beginning of learning to ride, we are also trying to exercise the children to have a forward-looking attitude no matter what they are doing.
Why is it important to give full support and encouragement?
It is safe to say that most children will encounter various problems while riding, so please do not rush at this time. If you show anxiousness and nervousness, children will lose confidence more easily. At this time, the most important point, please divert your child’s attention and eliminate their fear. By taking a break, after they are relaxed, please communicate with them as equals (they will like this approach). Guide the children to be bold, to face their problems head-on, and to rebuild their confidence so that they are in a better position to face the ride.
Step 5: Timely installation of pedals
Why not say that you need to install the pedals after fully mastering the balance?
In my opinion, when kids get too used to stomping on the ground to keep gliding, it takes them longer to get used to stomping on the pedals when they are mounted. This is not subjective on my part, my nephew Paul spends too much time on the balance bike. He did very well in maintaining balance and gliding, but after the pedals were installed, Paul did not do as well.
Under our observation, we also did find that Paul was somewhat unaccustomed to placing his foot properly on the pedal. Getting the tire to roll forward by pedaling. It took us a little longer to get Paul used to the presence of the pedals and the ease of getting the bike to roll forward with the pedals.
Therefore, installing the footrest in time for children to slowly try to put their feet on the footrest will be an important step.
Step 6: Stomp assist
Don’t let your guard down, your help is still needed at this time.
1, Let the child sit on the bike seat.
2, One foot flat on the ground, the other foot on the pedal (ready to pedal down the posture).
3, Start encouraging your child to pedal down. The start may be wobbly, so you can help your children hold the car properly. Tell them, “Stand up straight, look forward, and use your strength to pedal!
What else do you need to do?
Do you think that children have learned to ride a bicycle once they learn to pedal? Although, in this case, the child has already mastered a large part of the skill of riding a bicycle. But for stopping and steering skills, children still need your help.
What about teaching kids about parking?
Method I.
First off, show the children how to brake. Next, tell the children that blowing the whistle will stop the tires from turning. From the beginning of a slow ride to the speed of his ride, it takes constant practice this action. Of course, more often than not, I want you to give the kids a reaction time.
Method 2.
Tell them to press and hold the brakes when you need to stop and show them how the brakes simply work. Then, set up certain obstacles for the children to react and operate on their own.
Reasons for teaching children to learn to park
When children are ready to ride forward on their own with confidence, you need to start showing them the importance of stopping. Not having a steady stop can put your child’s safety at risk.
Different children’s bikes are set up differently in terms of brakes. But most are adhering to a point that meets the smaller strength and relatively flexible handling of children.
My nephew Paul owns a Trek Precaliber 16, a bike with a Coaster brake that allows him to stop by simply pedaling backward. Not only does he not have to push the brake button with his fingers, but the backward pedaling motion has also allowed him to develop his agility. Also, the relatively light weight of this bike provides the child with more confidence and support.
Of course, through the brake handle, braking is also appropriate, but at such times, you need to let the children keep their fingers closest to the brake at all times, and train their habit of braking in time.
In short, no matter what the situation is, children may encounter a variety of situations and are not immune to some bumps and bruises. But you should know that the road to growth, is not only happiness but also a little test. Of course, the necessary protection you must focus on.
How to teach your child to steer a bike?
Let the children try to turn on their own first, and you can set some rewards, which will motivate them. After all, children are more easily satisfied.
If you think your child needs a little help, you can use one hand to gently guide them. First and foremost, place your hand on the head tube, then guide your child through the steering experience, and then slowly lead him or her through the steering section of the road. It is important to note that you must not try to use your strength to control your child’s bike. This can upset your child’s balance and even make them lose their confidence and enjoyment of riding.
Can your teaching stop once the kids have just learned to ride?
With the same teaching style, some children may learn quickly and others more slowly. Age and physical strength of various factors will have a certain impact on his learning to ride.
Thus, in your daily life afterward, you can take your kids for more terrain rides. Not only can they get out of the house to get more riding fun, but also can exercise courage and dare to challenge the attitude of children.
Practice will be a better teacher, and through more practice, not only will the child’s riding skills be better improved. Riding will also become a skill that will benefit the children for life.
FAQ
- What is the best age to teach children to ride bicycles?
Most children will be ready and willing to learn to ride a bike between the ages of two and eight.
- What are the three main steps of cycling?
- Preparation before balancing
- Practice balance
- Pedaling exercises
Summary
Children always grow up with their parents, and of course, outdoor sports are an essential part. Teaching your child to ride a bicycle will give him better access to nature and will allow him to exercise effectively with his buddies outdoors. If you can find your child has a talent for sports, you can also let him participate in more competitions, so that he can gain more confidence.
Many of the parents we spoke to had more communication after teaching their children to ride, which was a sight we were happy to see.
![[Orbea URRUN 10 20mph Review] – Best Used By People Who Enjoy Riding To Get AFeel For The Mountains!](https://bestbikeselect.com/wp-content/uploads/2023/09/2023-Orbea-URRUN-10-20mph-35_-1024x1024.jpg)
![[Specialized Turbo Como 5.0 Review] – Good Choice?](https://bestbikeselect.com/wp-content/uploads/2023/08/2023-Specialized-Turbo-Como-5.01_-1024x1024.webp)
![2025 Built for Champions:[Orbea ORCA M21eTEAM PWR Review]](https://bestbikeselect.com/wp-content/uploads/2025/01/ORCA-M21eTEAM-PWR-1024x885.jpg)
![2025 Conquer Any Trail [Santa Cruz Bronson R Review]](https://bestbikeselect.com/wp-content/uploads/2025/01/Santa-Cruz-Bronson-R-1-1024x768.webp)
![2025 The All-Terrain Beast [Santa Cruz Hightower 3 MY24 Review]](https://bestbikeselect.com/wp-content/uploads/2025/01/Santa-Cruz-Hightower-3-MY24-1024x768.webp)
![The Best Comfortable Leisure Bike of 2025 [ Trek Verve 2 Lowstep Gen 5 ]](https://bestbikeselect.com/wp-content/uploads/2024/12/Verve-2-Lowstep-Gen-5-02-1024x681.png)
![2025’s Top Endurance Bikes [Cannondale Synapse Carbon 3 L Review]](https://bestbikeselect.com/wp-content/uploads/2025/01/Cannondale-Synapse-Carbon-3-L-1-1024x627.webp)